Tweaking the first print layer
Intro
This is a followup to my previous post Fixing the first layer when usual tweaks don't work. Where I describe issue of getting poor first layer print quality and the test I use check fixes I come up with.
I started working on this article first, however at the time I haven't found a solution for the problem I was trying to fix I sat on it for a while. Doing work described here, helped me come to a conclusion that something entirely different is wrong with my printer. I hope this could serve as a reference to someone who is looking at a print.
Test prints
I started off with the existing settings I had for E3D PLA filament and made some test prints to confirm the problem. I'm only mentioning settings for the first layer because that's the settings being tested.
#1
These are the original settings for the filament.
- Nozzle temperature: 195C
- Extrusion multiplier: 1.0
- Nozzle height: default
- Print speed: 15 mm/s^2
- First layer width: 0.42
- Part cooling fan 1st layer: 0%
I heard some clicking noise from the extruder during the print, which indicated that the motor had hard time pushing filament through the extruder. I should increase the nozzle temperature, and try to shrink the first layer to mitigate overlapping layers in the center of the print.
| Top | 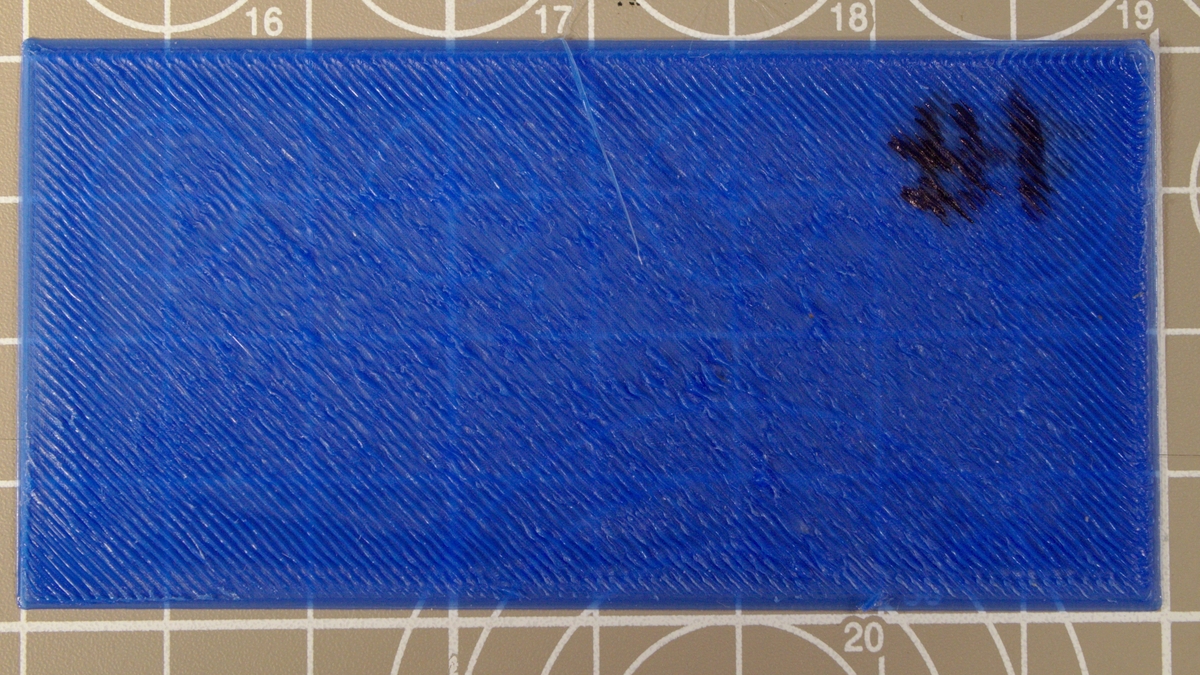
|
| Bottom | 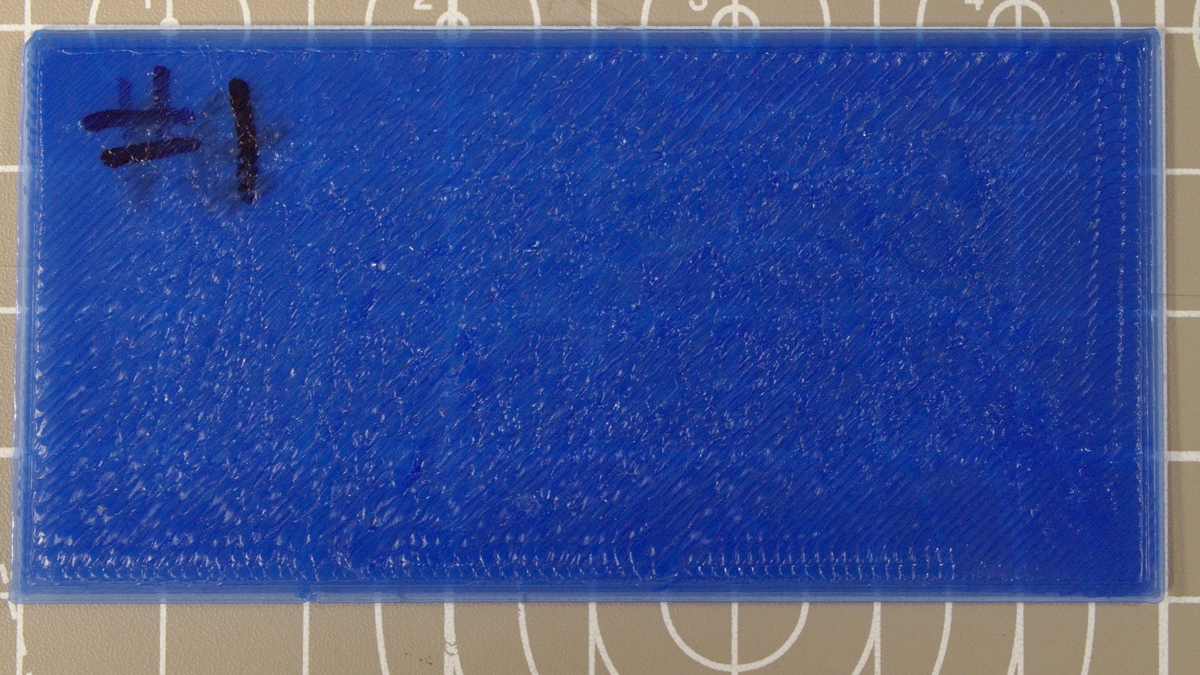
|
#2
Brought up the nozzle temperature to 225C, shrank the first layer width from 0.42 to 0.4.
- Nozzle temperature: 225
- Extrusion multiplier: 1.0
- Nozzle height: same
- Print speed: 15 mm/s^2
- First layer width: 0.4
- Part cooling fan 1st layer: 0%
The lines on the edges of each extrusion line (top view) indicate that the filament is too viscous and the nozzle temperature might be too hot. Shrinking extrusion with did nothing, so perhaps expanding it will fix overlapping layers at the bottom of the print, also increase the distance between heated bed and the nozzle.
| Top | 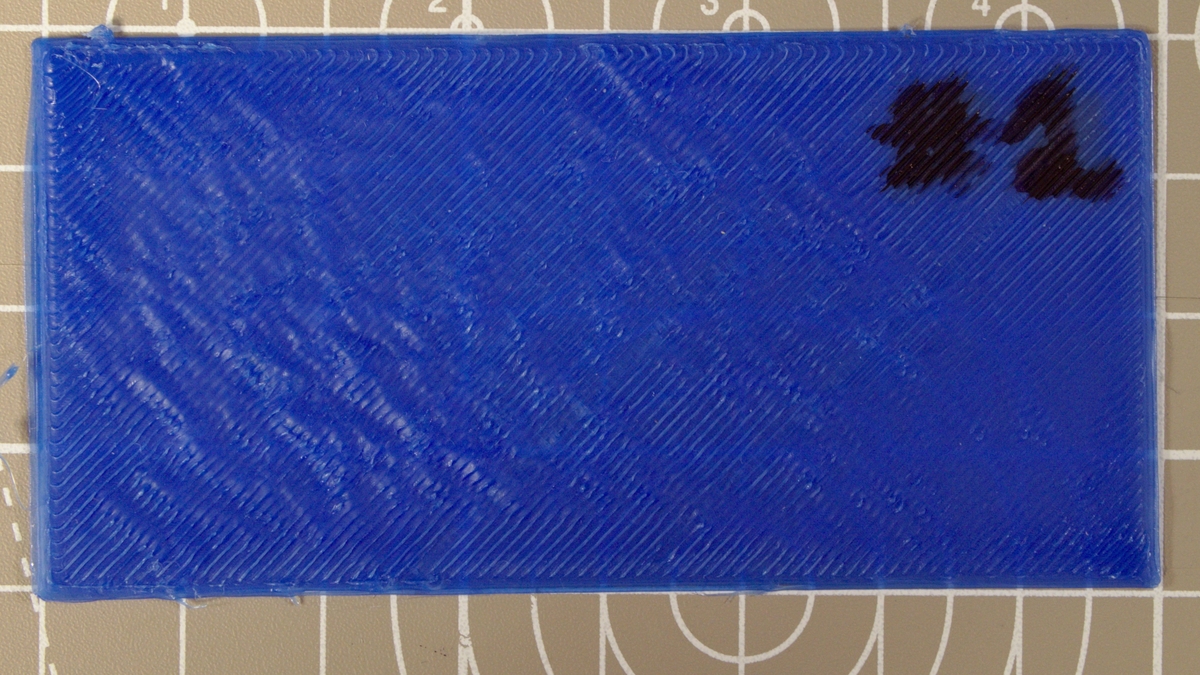
|
| Bottom | 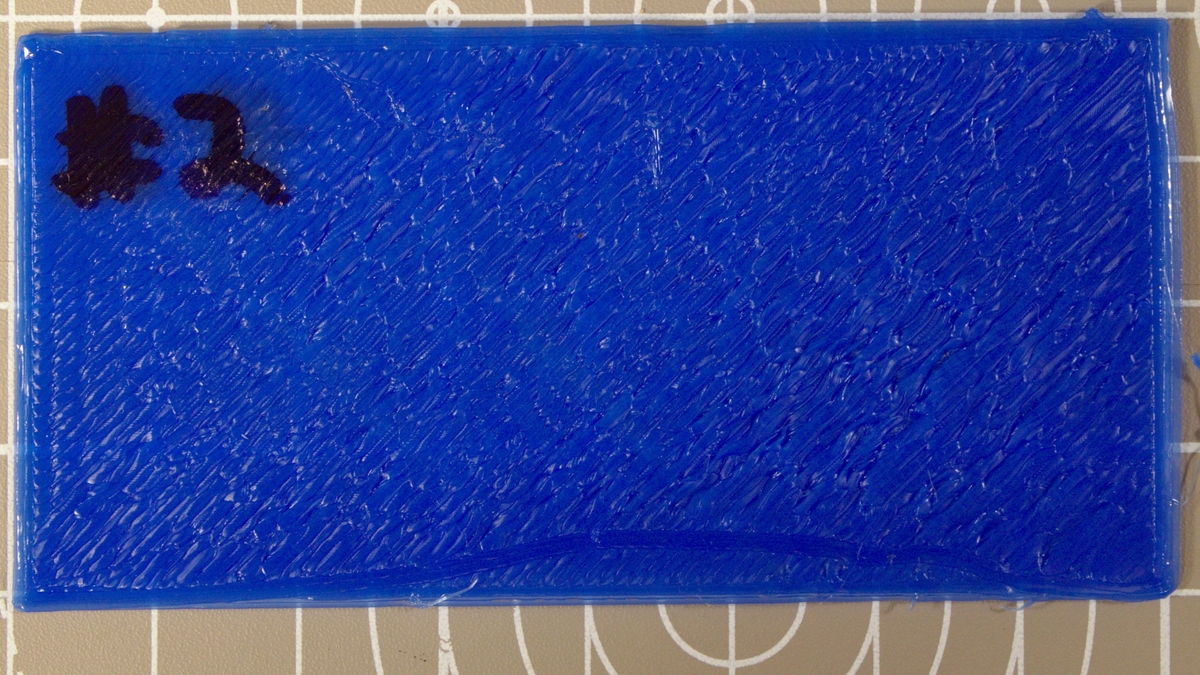
|
#3
Brought down the nozzle temperature to 220C, increased the with of the first layer up to 0.45 and slightly increased the distance between heated bed and the nozzle.
- Nozzle temperature: 220
- Extrusion multiplier: 1.0
- Nozzle height: slightly increase the distance between bed an nozzle
- Print speed: 15 mm/s^2
- First layer width: 0.45
- Part cooling fan 1st layer: 0%
I checked the extrusion multiplier to verify the extrusion coefficient is correct, and turns out it wasn't. Even when the first layer is printed correctly all others in this case would be under-extruded.
| Top | 
|
| Bottom | 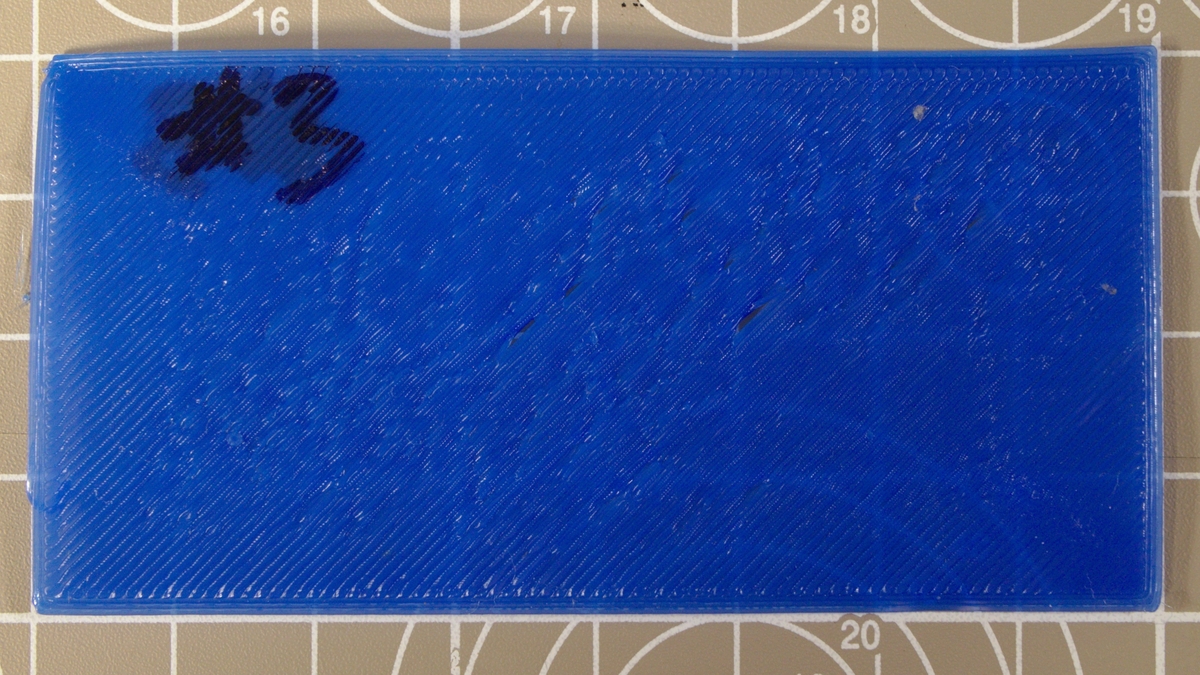
|
#4
Increased extrusion multiplier to 1.14
- Nozzle temperature: 220
- Extrusion multiplier: 1.14
- Nozzle height: slightly lower than on previous print
- Print speed: 15 mm/s^2
- First layer width: 0.45
- Part cooling fan 1st layer: 0%
The waves seem to ripple, which is slightly worse then the previous print, but the edges of the print are more clean. I'll try several tweaks: decrease temperature by 5C, decrease extrusion multiplier slightly to 1.1 and increase nozzle height tiny bit.
I'll increase print speed to note any decrease in quality.
| Top | 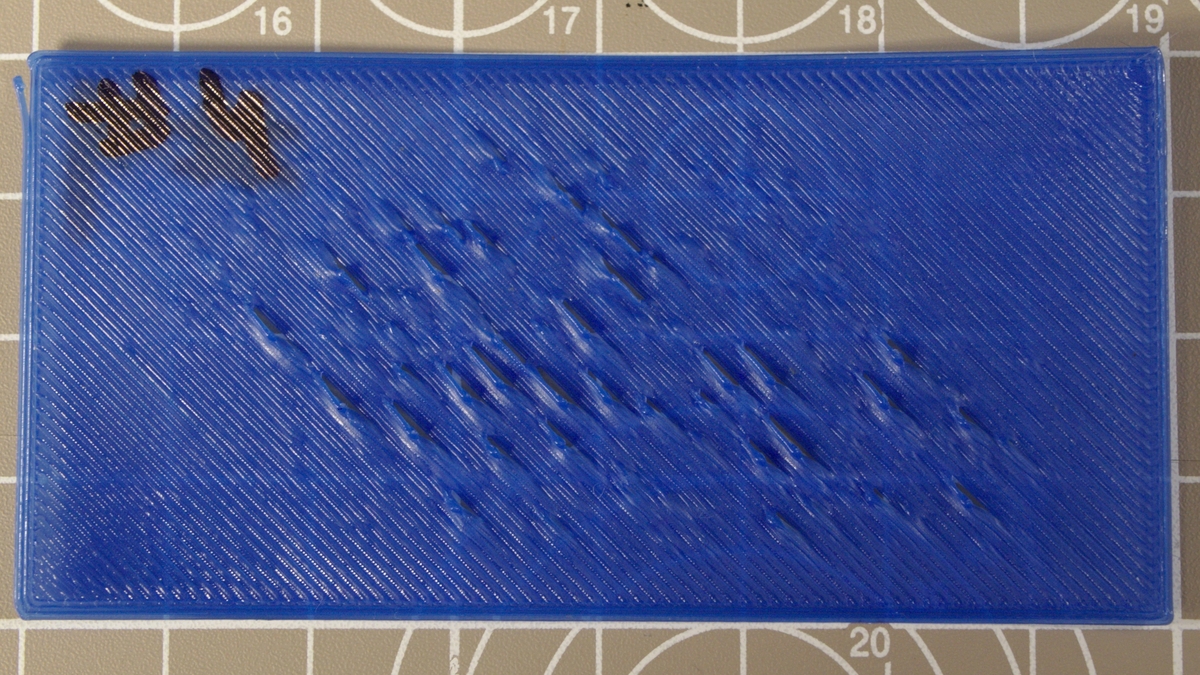
|
| Bottom | 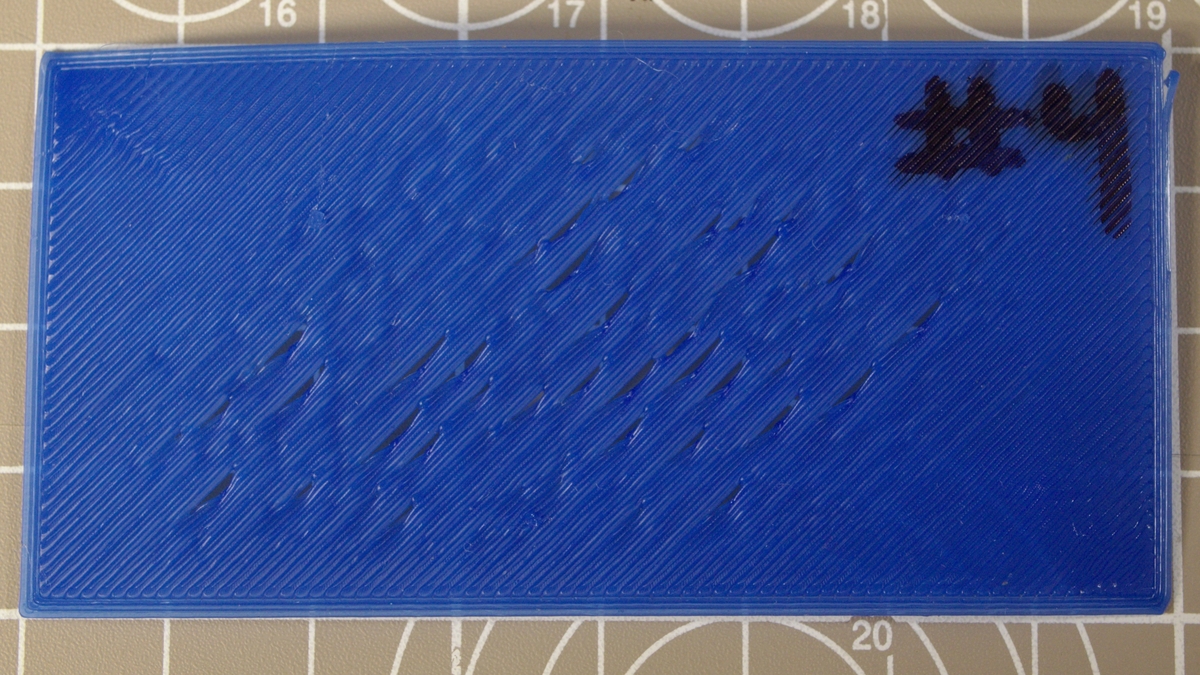
|
#5
This improved things slightly, the ripples are smaller but they are still present.
- Nozzle temperature: 215
- Extrusion multiplier: 1.1
- Nozzle height: slightly higher than on previous print (1/16 of a turn)
- Print speed: 25 mm/s^2
- First layer width: 0.45
- Part cooling fan 1st layer: 0%
For the next print, I'll bring the temperature up, decrease the print speed slightly and see if this does anything.
| Top | 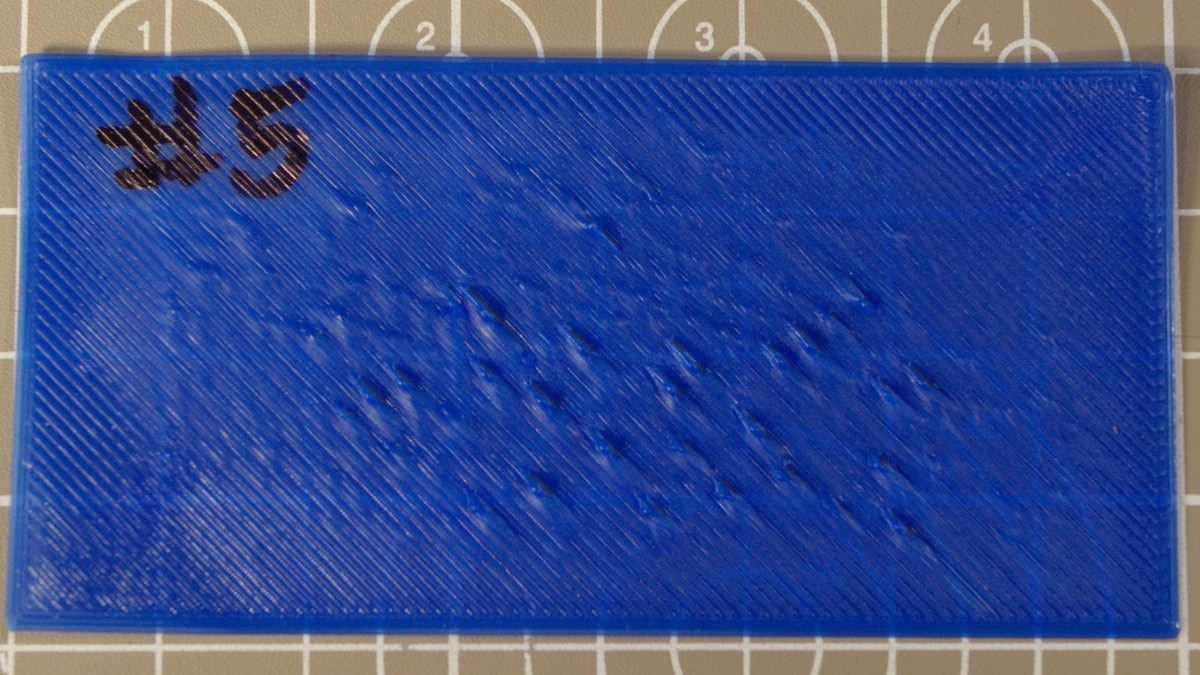
|
| Bottom | 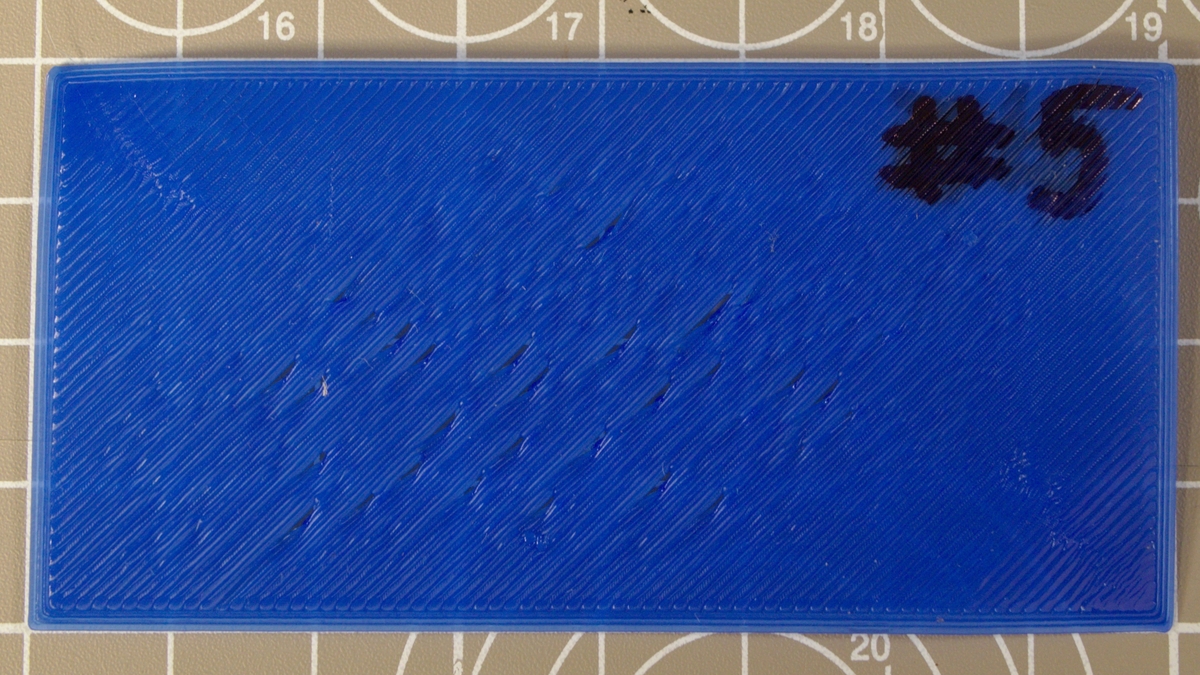
|
#6
This print doesn't tell me anything as point X-axis got stuck during print.
- Nozzle temperature: 220
- Extrusion multiplier: 1.1
- Nozzle height: no change
- Print speed: 20 mm/s^2
- First layer width: 0.45
- Part cooling fan 1st layer: 0%
Lubricating rods and bearings on the axis fixed the problem. I'll attempt print with the same settings.
| Top | 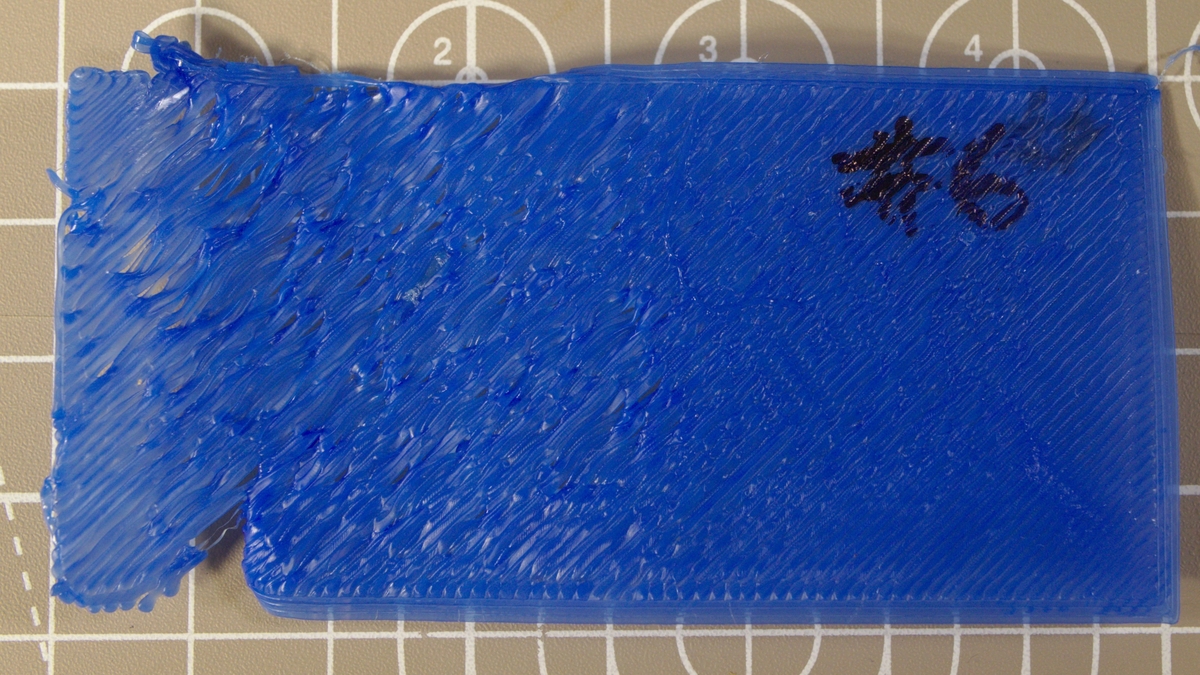
|
| Bottom | 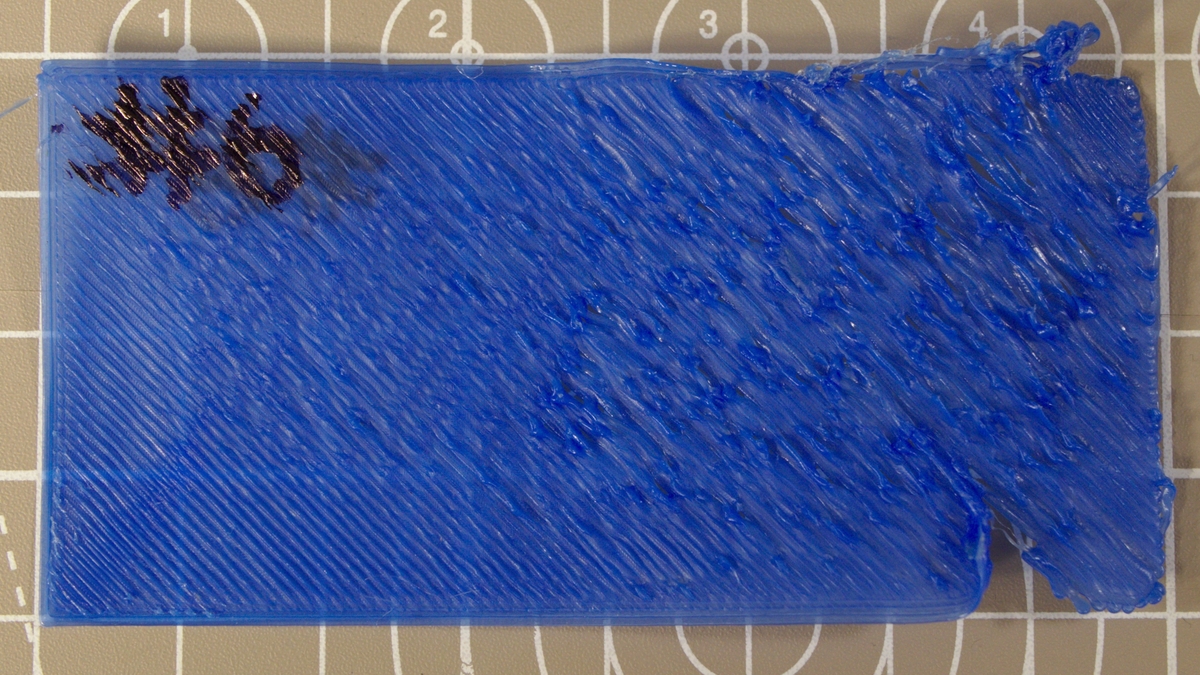
|
#7
This is slightly better, but I mostly run out of variables I can change for the print to make it any better.
- Nozzle temperature: 220
- Extrusion multiplier: 1.1
- Nozzle height: increase nozzle height
- Print speed: 20 mm/s^2
- First layer width: 0.45
- Part cooling fan 1st layer: 0%
I'm going to try turning on part cooling fan, event though it's not recommended for the first layer due to the issues with adhesion, but I want to see how this will affect extrusion width.
| Top | 
|
| Bottom | 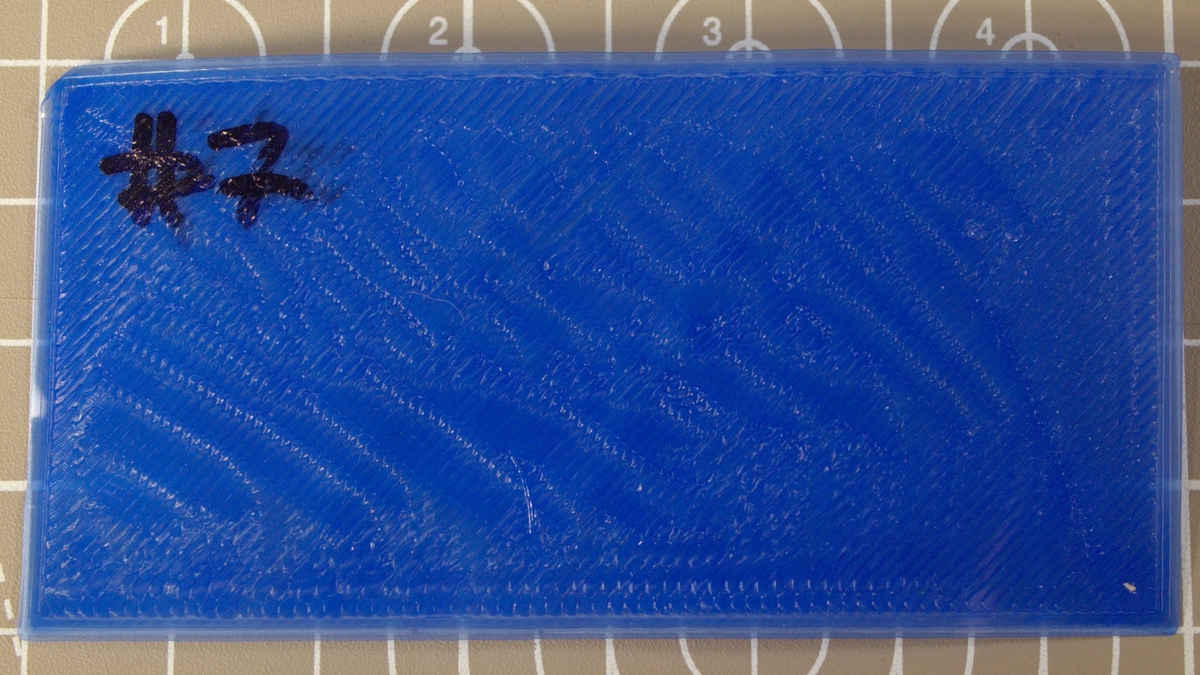
|
#8
Set part cooling fan to 20%
- Nozzle temperature: 220
- Extrusion multiplier: 1.1
- Nozzle height: no change
- Print speed: 20 mm/s^2
- First layer width: 0.45
- Part cooling fan 1st layer: 20%
This is slightly better. Now I'm going to turn off part cooling fan to see if anything else changed between the prints. To verify consistency of the results.
| Top | 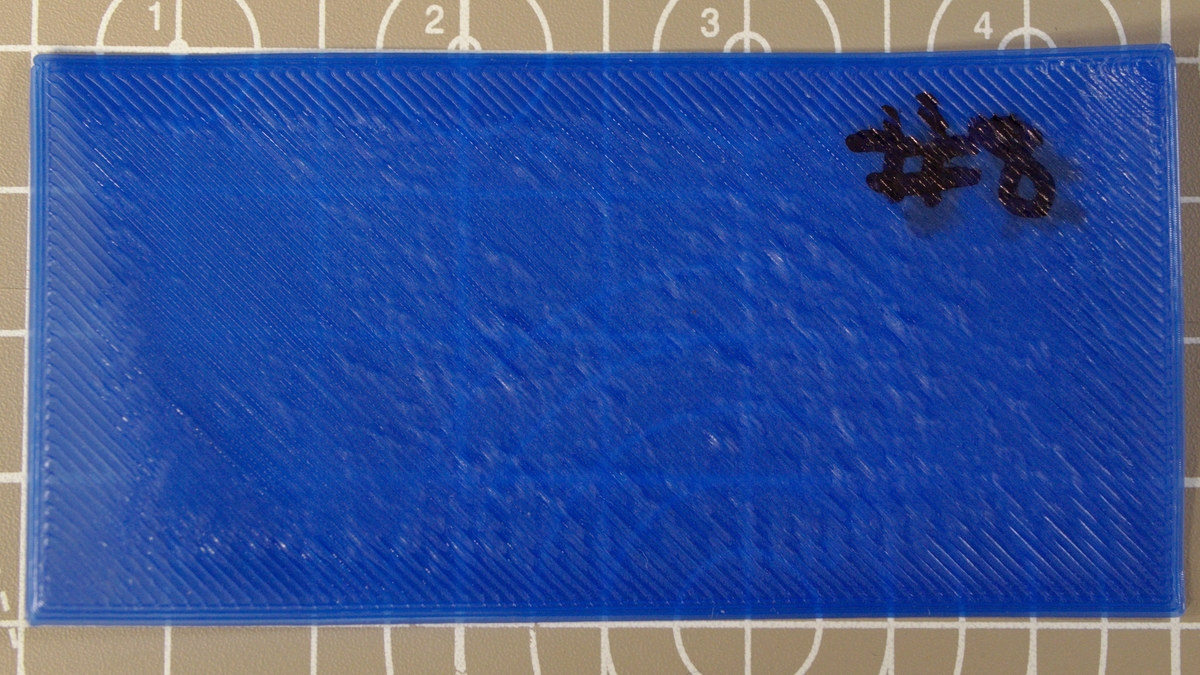
|
| Bottom | 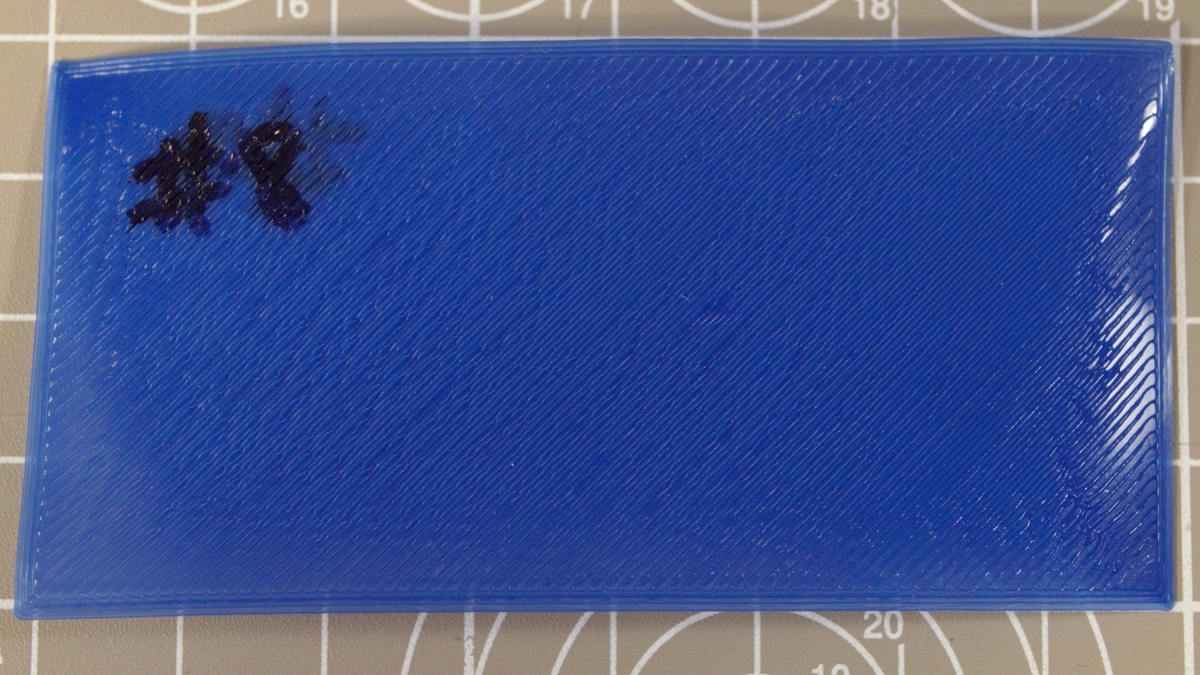
|
#9
Turned off the fan for the first layer
- Nozzle temperature: 220
- Extrusion multiplier: 1.1
- Nozzle height: no change
- Print speed: 20 mm/s^2
- First layer width: 0.45
- Part cooling fan 1st layer: 0%
Nothing conclusive I'll try to raise the nozzle a bit and see if that does anything.
| Top | 
|
| Bottom | 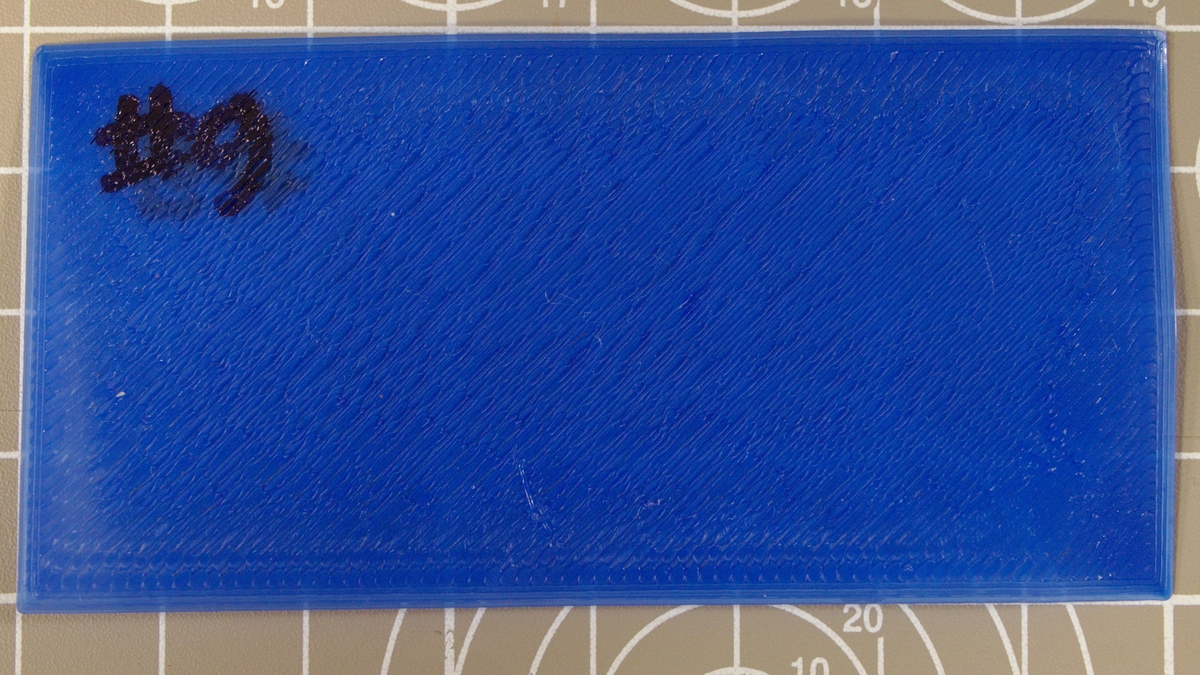
|
#10
Raised the nozzle.
- Nozzle temperature: 220
- Extrusion multiplier: 1.1
- Nozzle height: raise the nozzle
- Print speed: 20 mm/s^2
- First layer width: 0.45
- Part cooling fan 1st layer: 0%
This print is OK-ish but it is similar to #8, I'll try raising the nozzle again, maybe a little extra space will make first layer perfect
| Top | 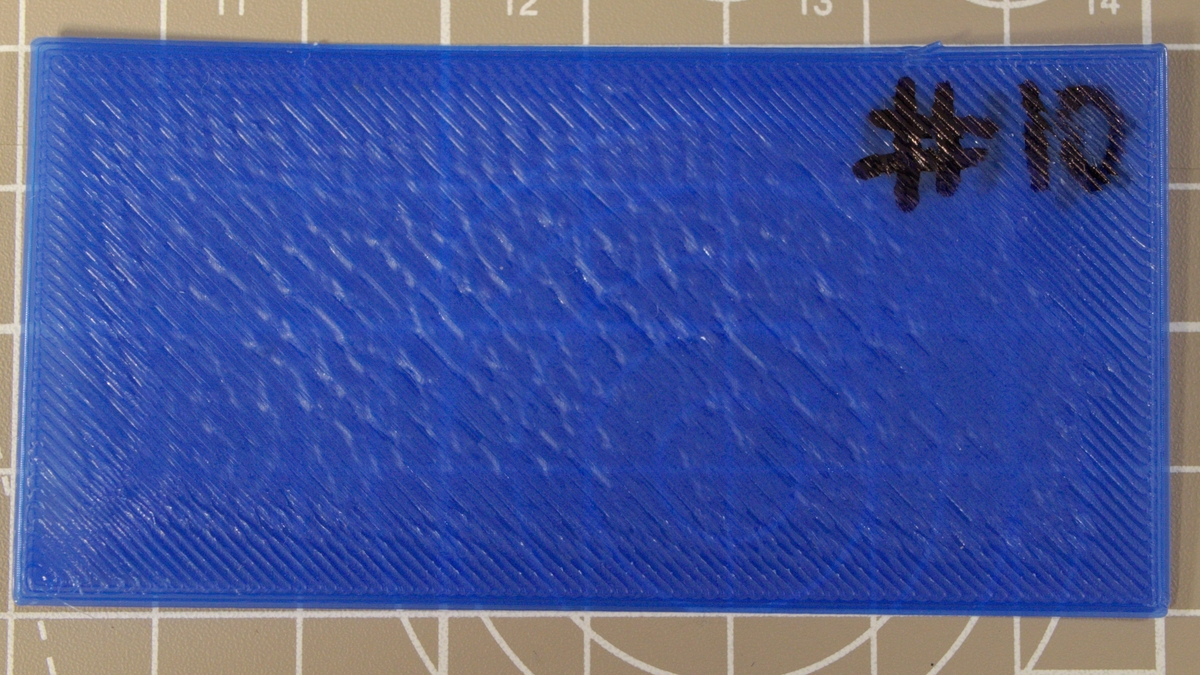
|
| Bottom | 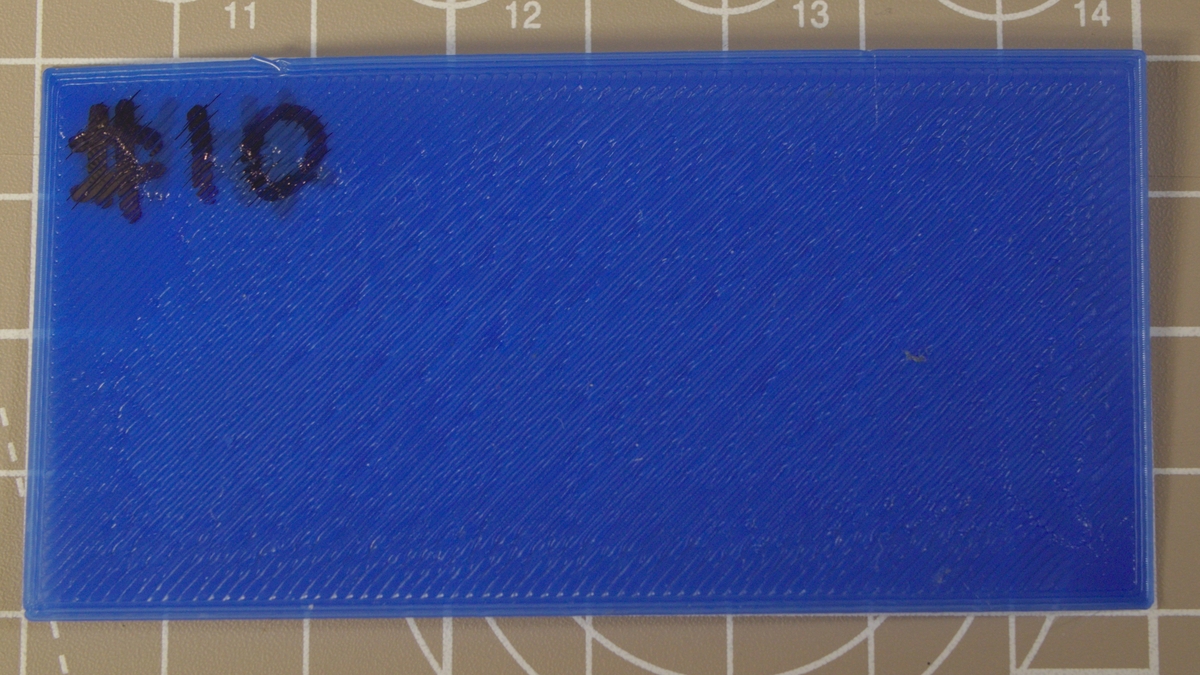
|
#11
Raise the nozzle again as this seems to be the only variable I haven't tweaked yet
- Nozzle temperature: 220
- Extrusion multiplier: 1.1
- Nozzle height: raise the nozzle
- Print speed: 20 mm/s^2
- First layer width: 0.45
- Part cooling fan 1st layer: 0%
There is too much room in the center of the print causing the layers to go bulge and split this is a lot of worse that #10 and I've raised the nozzle way too far.
| Top | 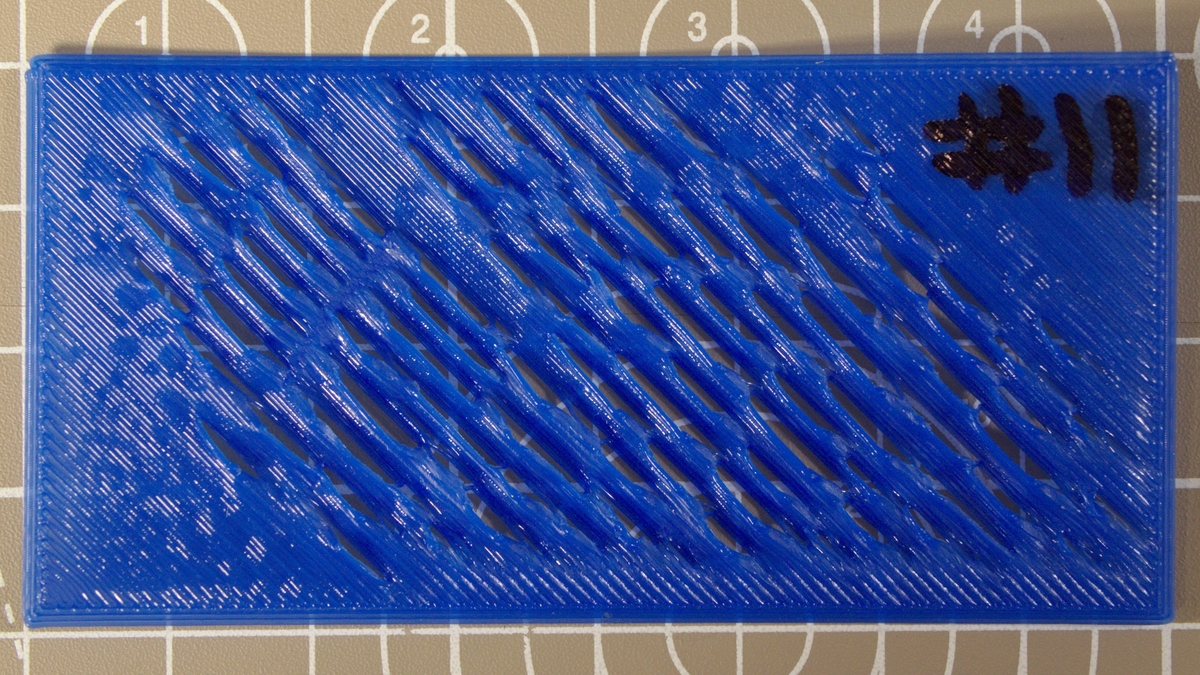
|
| Bottom | 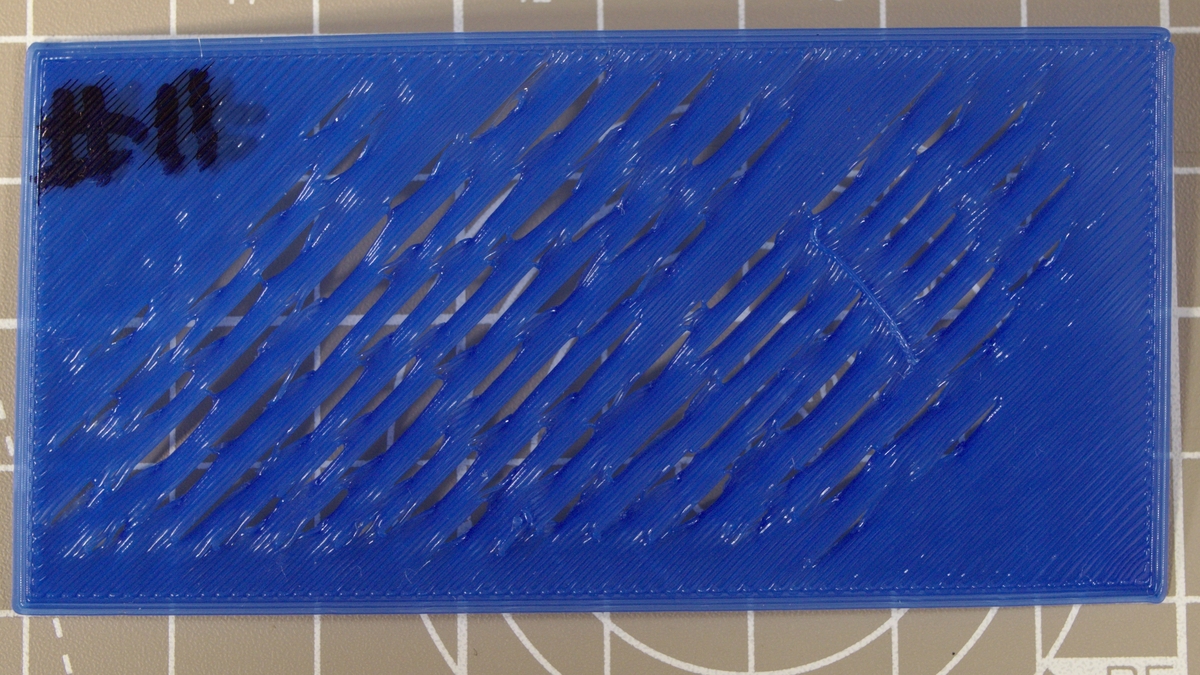
|
Conclusions
In my case there is no easy fix and a random article on the internet about how to fix the first layer on your printer might not be considering my particular case, but these articles are useful as an example of different sample problems.
Other things to try to fix the issue:
- The bed is bent in the middle (to many nozzle crashed into it one too many times. INstall a new bed and fix probe that it no longer crashes into bed because I didn't put any springs between heated bed to y-axis carrier. That made the bed more susceptible to deformation.
- Slow down probing speed and increase number of probing points from 4 to 5. That might help with some inaccuracies. This turned out to be thing that fixed the issue.
- There also might be an issue with nozzle clogging and bubbling PLA.
- Experiment with creating and loading custom bed mesh. But in this case I will still have to deal with the problem of having really uneven bottom surface of a part.